How To Replace Toilet Flapper
The man who keeps the toilet clean the same as the interior of his house is identified as a hygienic man. Only the cleaning of the toilet commode is not enough to use a clean washroom. when a toilet is always in a running situation then it’s normal that the equipment of it is getting old. Maybe some essential staff is started to get fail in their work. Sometimes we can notice some wasted waters are trickling down outside of the toilet.
How To Replace Toilet Flapper
It means obviously it is time to change the toilet flapper as soon as possible. When the toilet paper flapper can’t do it work properly at that time, we can notice some extra water is wasted and trickling down. And this wasted waters sometimes started to make dust and strains on the toilet floor.
Many of us don’t know how to change or replace a toilet flapper. Here we are going to discuss this widely. So, let’s get started without wasting any time.
Stop the water flow of the tank and disconnect the valve:
Before starting the work of replacing a toilet flapper, the first step is to turn off the water flow to the tank. It makes the work faster. With the water flow, we can’t do our work easily. So, make sure to stop the flow of the tank before start the work.
Now find the shut-off valve on the down part of the toilet. There we can also find the dial. So now we have to turn the dial clockwise. We have to turn this until the move is stopped.
Sometimes we can face some problems with doing this work. It is possible sometimes that the valve does not turn on by only using our hands. At that time, we can also use a lubricant. We can spray lubricant on the valve and wait for 5 to 6 minutes. If we can wait that long then the lubricant will sit on the valve perfectly. Now try to twist the valve backward and frontwards to make it lose.
People also use sometimes a pair of pliers. But we suggest not using this because sometimes it causes damage to the valve. It also sometimes becomes the reason for a leak in the water tank. So, try to avoid using it.
Maybe after turning the water flow off, we can hear some trickling sound. It’s not to worry about anything in this. The sound is for stored the escaping water of the tank. This sound is not for the pumped in new water drops inside the tank.
Another important thing is if someone is not able to shut off the water valve of the toilet or bathroom, then it becomes obvious for them to stop the water connection of their hole house.
Remove the old flapper valve:
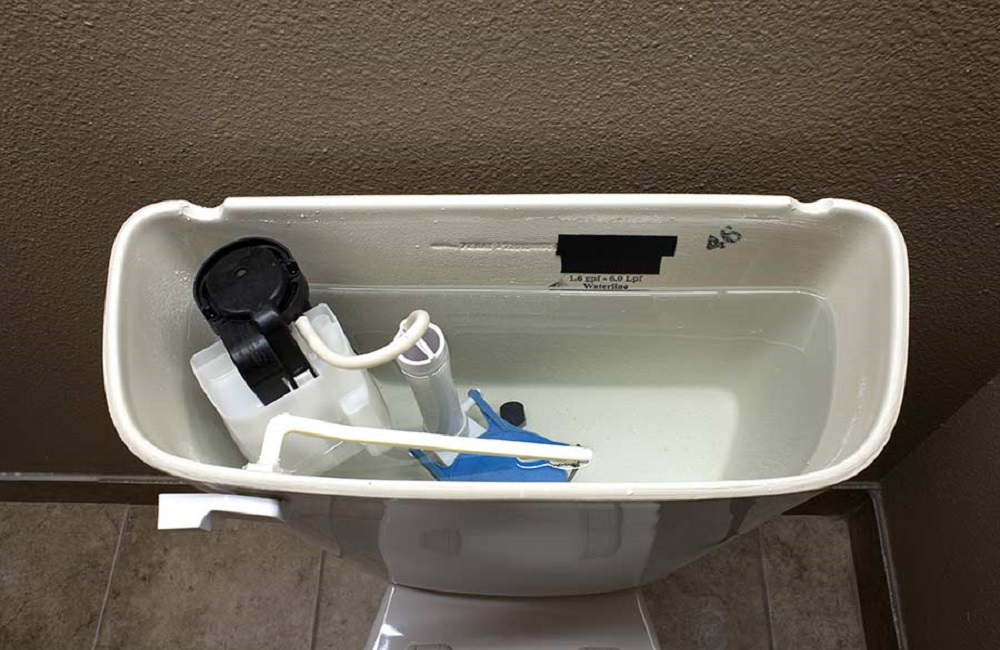
The flapper is basically a sheet of rubbers that sits above the hole that leads to the release of the water to the tank. Mainly it attacked in two places at the same time. One is attached to the tiny pegs of the tubular overflow and another is attached to the handle lever. Before starting the work, it’s better to unzip that chain first. Then drug the edges of the flapper. The importance of drug the edges is, it makes the flapper free from the pegs.
One thing we always should be in consideration that we must be very careful when we are going to take out the flapper outside of the tank. It can exposure to hard water which can able to make it brittle. For being brittle it can the reason of break into pieces if we can’t handle it smoothly. If we handle them too roughly then it’s obviously broken into many little pieces. Obviously, watch out for this.
When we go to look at the flappers then we can notice most of the new flappers comes with attached with a chain. So, it is an important thing to check at your new flapper has a new chain or not. If the new one has a chain attached to it, then it is obvious to remove the chain from the flush lever.
Check out the new flapper before purchase:
At the time buy a new toilet flapper then many people don’t understand what to do. Many people directly go to the shop without knowing the old paper he had used. But it’s important to know about the old flapper he used already when anyone goes to buy a new one. It’s good to bring the old flapper with him when he goes shopping.
If someone knows the previous toilet flapper then it will be good for him to compare the style and some specific difference between the old one and the new one. It can make him choose a better toilet flapper for the future. comparison before buying a new one is good because at that time people can know that which will be long-lasting for them.
We have to make sure before buying a new one that the flapper size is the same as our toilet flush valve or not. Know about the size is important here because if the size is not the same then and it’s will be a big trouble to fit on the flush tank like before. We should also check that this new flapper uses the same points of our connection as previous or not.
Basically, the toilet flappers are available in the market in different sizes and specifications. So, we have to choose the best bet rubber flapper for our toilet.
Install the new flapper:
Now it’s time to replace the old flapper into the new one. The first thing we have to do is connect the new flapper with the flush valve. It’s like the same procedure when we are disconnecting the chain and take out the old flapper. The same way we have to put it back in the same place like before. We have to slide off the rubber seal over the pegs of the valve. Then have to connect the lift chain with the lower handle lever. Now we can lower the flapper to check it sits in the perfect place or not. It is good to double-check the connection of the flapper for not to happening any failure in the future.
Conclusion:
In short, we can say, we have to start the work by turning off the water flow of the toilet and then have to drain the tank to get access to the flush elements. After that remove the old flapper from its place and then replace a new one in its place.
Hopefully, it doesn’t seem very hard work to replace the toilet flapper. If you have anything to ask more about this topic then please let us know in the comments below. Thanks to all.


